Creating an URL shortener using Django framework
Introduction
URL shorteners have become an integral part of modern online communication. They provide a convenient way to share long and complex URLs in a concise and memorable format.
In this step-by-step guide, We will explore how to build a URL shortener using Django, a powerful web framework written in Python. By the end of this guide, you will have a functional URL shortener application that can help boost your online presence and enhance user experience.
Prerequisites
Before diving into this tutorial, ensure that you have the following prerequisites in place:
Basic understanding of Python and Django Framework.
Python (version 3.6 or above) and pip installed on your system.
Familiarity with the Django framework and its concepts.
[Note: Use Virtual Environment For Good. 👍 ]
Steps
1. Setting Up the Django Project
To start building our URL shortener, we need to set up a new Django project. We’ll cover the installation process and project initialization.
To get started, follow these steps to set up the Django framework:
Install Django Framework using pip:
pip install django
Create a new Django project:
django-admin startproject myproject
Create a new Django app within your project:
cd myproject
python manage.py startapp myapp
2. Configure Django
Open your Django project’s settings.py file and write the following code :
INSTALLED_APPS = [
    # ...
    # ..
    # .
    # 👇 1. Add this line
    'myapp',
]

TEMPLATES = [
    {
        # 👇 2. Add this line
        'DIRS': ['templates'],

    },
]
3. Add the URLs
In this, For accessing our application myapp urls we have to add the following line to the myproject/urls.py file.
Open the urls.py from inside of myproject folder and write the following code:
from django.contrib import admin
from django.urls import path, include # 👈 1. Add this line

urlpatterns = [
    path('admin/', admin.site.urls),
    # 👇 2. Add the app url on this
    path('', include('myapp.urls'))
]
URL Configuration of views:
Create a new file urls.py inside the myapp folder and write the below code:
from django.urls import path
from . import views

urlpatterns = [
    path('', views.index, name='index'),
    path('<str:short_code>/', views.redirect_to_original, name='redirect'),
]
Here’s a breakdown of the code:
from django.urls import path: This line imports thepathfunction from thedjango.urlsmodule. Thepathfunction is used to define URL patterns in Django.from . import views: This line imports the views module from the current directory. Theviewsmodule contains the functions that handle HTTP requests and generate HTTP responses.urlpatterns: This is a list that holds the URL patterns for the application. It is a mapping between URLs and the view functions that handle those URLs.path('', views.index, name='index'): This line defines a URL pattern for the root URL (i.e., the base URL of the application). The empty string''represents the root URL. When a user accesses the root URL, theviews.indexfunction will be called to handle the request. Thename='index'parameter is an optional name for the URL pattern, which can be used to refer to this URL in the Django templates or code.path('<str:short_code>/', views.redirect_to_original, name='redirect'): This line defines a URL pattern that captures a variable calledshort_code. The<str:short_code>part is a URL parameter that captures any string value and assigns it to theshort_codevariable. This pattern will match URLs with a short code appended to the root URL. For example, if the root URL isexample.com/, thenexample.com/abc123/will match this pattern. Theviews.redirect_to_originalfunction will handle the request when this pattern is matched. Similar to the previous pattern, thename='redirect'parameter assigns a name to this URL pattern.
These URL patterns determine the flow of incoming requests in the Django application. When a user accesses a specific URL, Django will match the URL against these patterns and call the corresponding view function to generate the response.
4. Add The Url Model
Now, Open the models.py file from inside of myapp and write the following code:
from django.db import models
import string
import random

# Create your models here.
class  Url(models.Model):
    original_url = models.URLField()
    short_code = models.CharField(max_length=10, unique=True)
    created_at = models.DateTimeField(auto_now_add=True)

    def __str__(self):
        return f"{self.original_url} | {self.created_at}"

    def save(self, *args, **kwargs):
        if not self.pk:
            self.short_code = self.generate_short_code()
        return super().save(*args, **kwargs)

    def generate_short_code(self):
        characters = string.ascii_letters + string.digits
        short_code = ''.join(random.choice(characters) for _ in range(6))
        return short_code
The first line imports the
modelsmodule from Django, which allows us to define database models.The next two lines import the
stringandrandommodules, which are used for generating random short codes.The
Urlclass is defined, inheriting frommodels.Model, which is the base class for Django models.Inside the
Urlclass, there are three fields:original_url: This field is of typemodels.URLField()and represents the original URL that will be shortened.short_code: This field is of typemodels.CharField(max_length=10, unique=True)and represents the shortened code for the URL. It has a maximum length of 10 characters and must be unique.created_at: This field is of typemodels.DateTimeField(auto_now_add=True)and represents the timestamp when the URL was created. It is automatically set to the current date and time when a newUrlobject is created.The
__str__method is overridden to provide a human-readable representation of aUrlobject. It returns a string containing the original URL and the creation timestamp.The
savemethod is overridden to generate a unique short code for the URL if it is being saved for the first time (if not self.pk). Thegenerate_short_codemethod is called to generate a random code using alphanumeric characters. This method generates a six-character short code by randomly choosing characters from the set of lowercase and uppercase letters (string.ascii_letters) and digits (string.digits).Finally, the
savemethod callssuper().save(*args, **kwargs)to save theUrlobject in the database.
This code defines a Django model called Url with fields for the original URL, the shortened code, and the creation timestamp. It also includes methods to generate a unique short code and automatically set it when the URL object is saved for the first time.
5. Add the View Function
Open, The views.py from myapp folder and write the below code for showing and redirecting to our templates:
from django.shortcuts import render, redirect
from .models import Url

# Create your views here.
def index(request):
    context = {}
    if request.method == 'POST':
        original_url = request.POST['original_url']
        url = Url.objects.create(original_url=original_url)
        short_url = request.build_absolute_uri('/') + url.short_code
        context['short_url'] = short_url

    return render(request, 'index.html', context)

def redirect_to_original(request, short_code):
    url = Url.objects.get(short_code=short_code)
    return redirect(url.original_url)
Let’s understand the code:
from django.shortcuts import render, redirect
from .models import Url
This code imports the necessary functions and the Url model from Django. render is a function used to render the HTML templates, and redirect is a function used to redirect the user to a different URL.
def index(request):
    context = {}
    if request.method == 'POST':
        original_url = request.POST['original_url']
        url = Url.objects.create(original_url=original_url)
        short_url = request.build_absolute_uri('/') + url.short_code
        context['short_url'] = short_url

    return render(request, 'index.html', context)
The index function is a view function that handles the rendering of the index page. It takes a request parameter, which represents the HTTP request made by the user. Within this function, a context dictionary is created to store data that will be passed to the template.
If the request method is POST, indicating that the user has submitted a form, the original URL is extracted from the request using request.POST['original_url']. Then, a new instance of the Url model is created with the original URL. The Url.objects.create() method saves the instance to the database.
Next, the short URL is constructed by concatenating the base URL (request.build_absolute_uri('/')) with the short_code attribute of the created Url instance. This short URL is added to the context dictionary with the key 'short_url'.
Finally, the render function is called to render the index.html template, passing the request, template name, and context dictionary as arguments.
def redirect_to_original(request, short_code):
    url = Url.objects.get(short_code=short_code)
    return redirect(url.original_url)
The redirect_to_original the function is another view function that handles the redirection to the original URL based on the provided short_code parameter. When a user visits a shortened URL, this function is invoked.
It retrieves the Url instance from the database that matches the provided short_code using the Url.objects.get() method. Then, it uses the redirect function to redirect the user to the original_url the attribute of the retrieved Url instance.
Overall, these views enable the URL shortening functionality. The index View handles the submission of the URL shortening form and displays the shortened URL, while the redirect_to_original view redirects the user to the original URL when they visit a shortened URL.
6. Templates
Create a folder named templates inside the myproject folder and create a file inside templates folder called index.html and write the below code:
<!doctype html>
<html lang="en">
<head>
  <meta charset="utf-8">
  <meta name="viewport" content="width=device-width, initial-scale=1">
  <title>URL Shortener</title>
  <!-- Bootstrap 5 CSS -->
  <link href="https://cdn.jsdelivr.net/npm/bootstrap@5.2.3/dist/css/bootstrap.min.css" rel="stylesheet"
    integrity="sha384-rbsA2VBKQhggwzxH7pPCaAqO46MgnOM80zW1RWuH61DGLwZJEdK2Kadq2F9CUG65" crossorigin="anonymous">
</head>
<body>
  <div class="container mt-5">
    <h3 class="text-dark my-3">Welcome to Url Shortener 🔗</h3>
    <form method="POST">
      {% csrf_token %}
      <div class="mb-3">
        <input type="url" name="original_url" class="form-control" placeholder="Enter Long Link Here" required>
      </div>
      <button type="submit" class="btn btn-primary text-uppercase">Get Short URL</button>
    </form>
    {% if short_url %}
      <p class="text-dark my-3">Your shortened URL: <a href="{{ short_url }}" target="_blank">{{ short_url }}</a></p>
    {% endif %}
  </div>
  <!-- Bootstrap 5 JS -->
  <script src="https://cdn.jsdelivr.net/npm/bootstrap@5.2.3/dist/js/bootstrap.bundle.min.js"
    integrity="sha384-kenU1KFdBIe4zVF0s0G1M5b4hcpxyD9F7jL+jjXkk+Q2h455rYXK/7HAuoJl+0I4"
    crossorigin="anonymous"></script>
</body>
</html>
Let’s break down the code into different sections:
<head>: This section contains meta tags and the title of the web page. It also includes a link tag that imports the Bootstrap 5 CSS file from a CDN (Content Delivery Network) to style the page.<body>: The body section of the HTML document contains the visible content of the web page. Inside it, we have a<div>element with thecontainerclass, which provides a fixed-width container for the page content. Themt-5class adds top margin to the container.<h3>: This heading element displays the welcome message for the URL shortener application.<form>: This form element is used to collect user input. It has themethodattribute set to "POST" to send the form data to the server. The{% csrf_token %}template tag is a Django-specific tag that adds a CSRF (Cross-Site Request Forgery) token to the form for security purposes.<input>: This input element of type "url" allows users to enter a URL to be shortened. It has thenameattribute set to "original_url", theclassattribute set to "form-control" for Bootstrap styling, and theplaceholderattribute provides an example or hint to the user. Therequiredattribute ensures that the input field must be filled before submitting the form.<button>: This button element is the submission button for the form. It has thetypeattribute set to "submit”.
7. Testing and Running
Now that we have set up the basic structure of our application using Django Framework, it’s time to test and run the app. Follow these steps:
Step 1: Open your Command-Line Interface:
Open your command-line interface and navigate to the root directory of your Django project.
To proceed, please open the terminal within the myproject folder and execute the following command:
python manage.py makemigrations
python manage.py migrate
Step 2: Start the Server:
To start the server, run the following command in your command-line interface:
python manage.py runserver
This command will launch the Django development server.
Step 3: Testing
After running the server and accessing the project interface at http://127.0.0.1:8000/ .
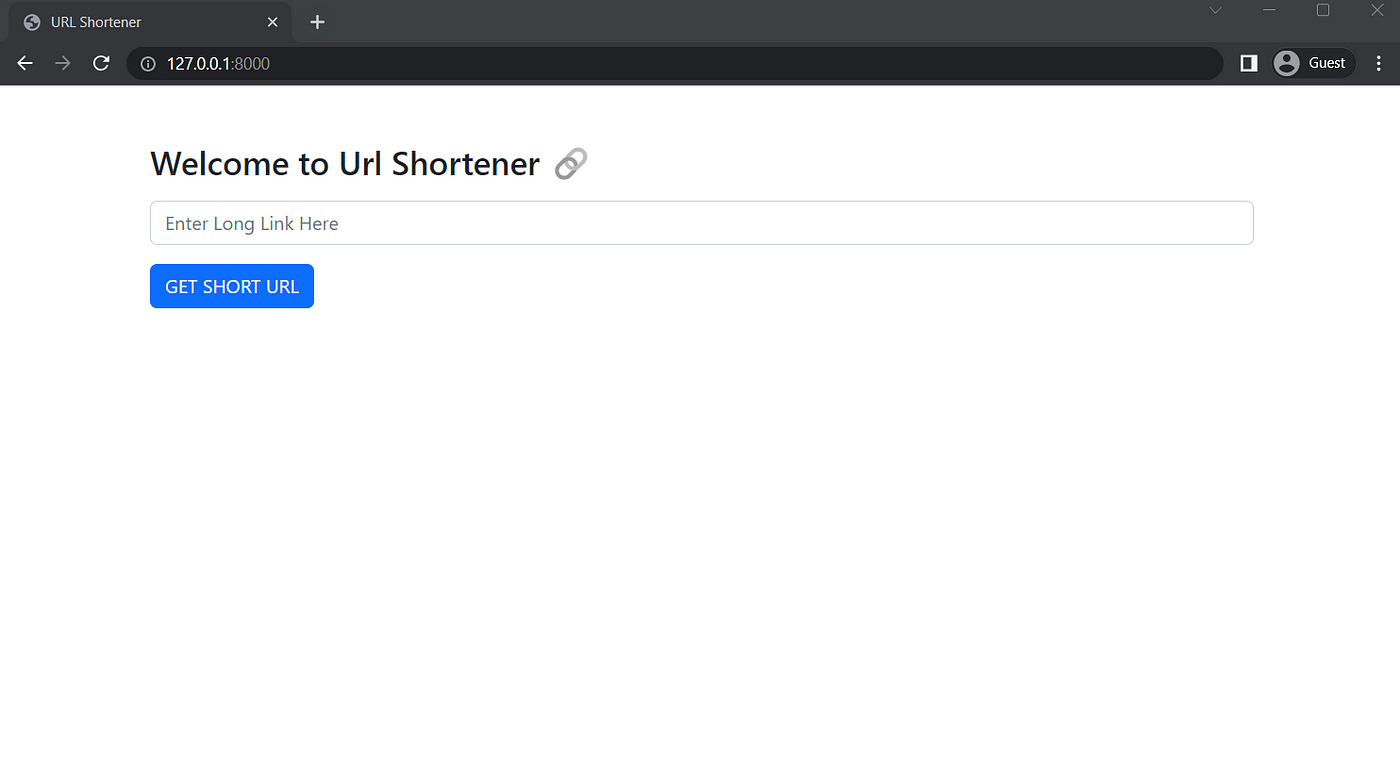
Open any browser and hit : http://127.0.0.1:8000/ URL and you can the home page of our website looks like this:

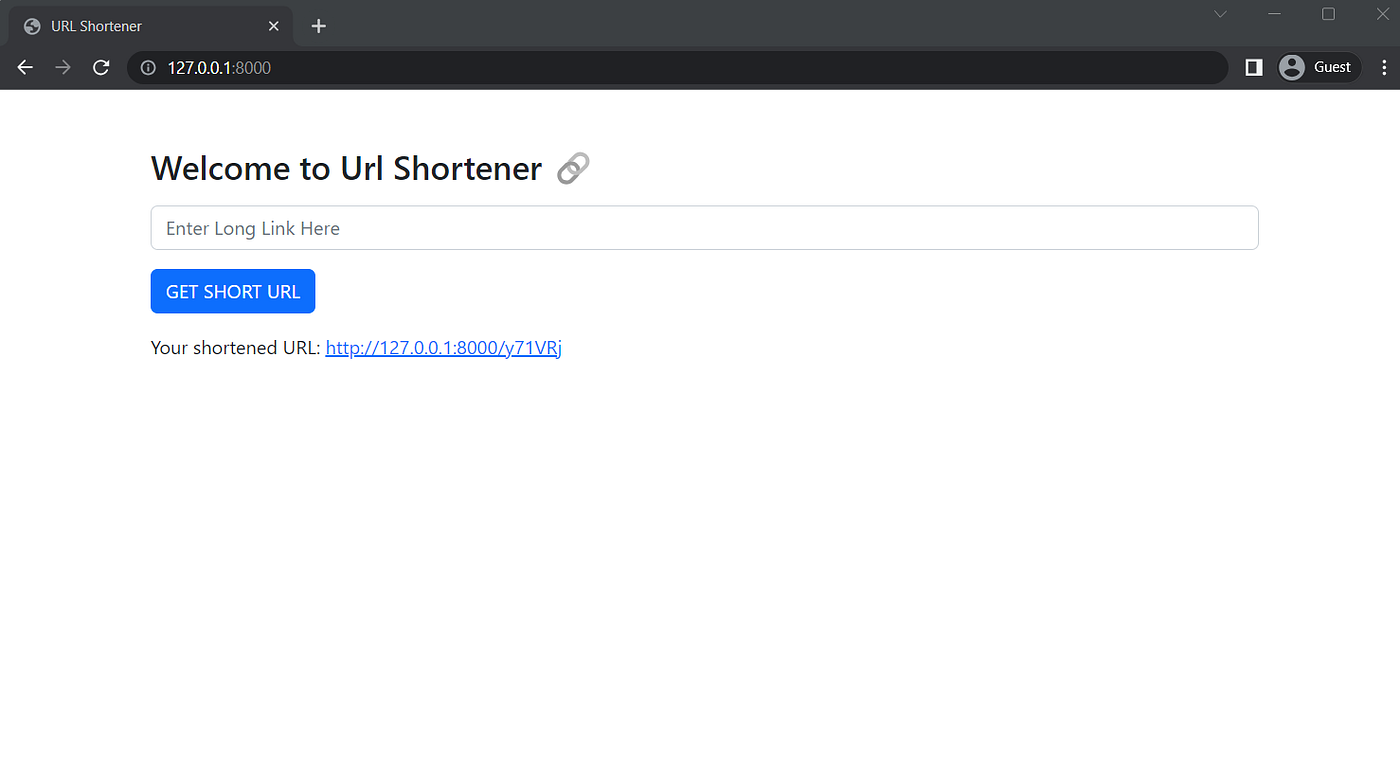
Final Result, Paste your long link in the input box and click on “GET SHORT URL”.

